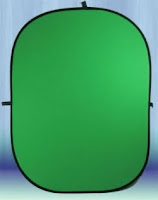
 Greenscreen studio is the perfect solution for making creative videos in every house. Amazing results no previous experience is needed, every mom and dad can use it on a low budget. Have you heard about greenscreen studio or green screen technology?
The term seems for us the non technological people a combination of fear and desire. We dream about it but we do not dare to try and use it. Don't let it frighten you any more it is in the reach of your finger tips.
Beginners Greenscreen Studio
After recording your video in your home greenscreen studio you will obviously want to replace the green screen recordings with your own new backgrounds.
This process is called chroma keying. Keying a color means selecting a color and removing every instance of a selected color in the image. It will make the background that is placed "behind" this image then becomes visible.
2 Common ways the greenscreen studio works:
1. Using a special effect generator
2. Using editing software
My advice to beginners in their couple first experiences is to use post-production methods in their greenscreen studio because it is easier and most common.
Green screen program may have a different variation and different editing process. However, the general process for most applications is the same.
Here are basic steps to operate your green screen program:
1. Place the green screen data on a layer in the timeline.
2. Place the background data or image on a layer below the green screen data.
3. Add a green screen effect to the top layer.
4. Select green as the color to use in the key. (Most software provides a color picker to help you do this).
5. After selecting the color, parts of the image will become transparent, and you should see the background appear in these parts. Adjust various parameters to get the best effect.
Greenscreen Studio - Is It All About Lightning?
OK we have overcome the fear from computers and programs but what about that dreadful thing called LIGHTNING.
Operating any greenscreen studio has to do with its own lightning requirements. It is highly unlikely that you would be able to use the screen with existing ambient lights of your house or the same light you use to light your foreground subjects on stage.
Here is a short explanation that will clarify the process for you:
Before you begin constructing your set you should plan your greenscreen studio lights. You need two different set of lights, you would not be able to use on your screen lights the same lights you use for the foreground subjects. The key point of lighting a green screen is to create a consistent shade of color across your entire screen. You will need at least 2 lights, having 4 will be nearly perfect.
You could light a greenscreen studio using a couple of 300-500w lights (one at each end) and a couple of 100-250w lights pointing up. Tip: Using diffusion filters when lighting green screens will help creating even lightning on the screen and reduce the impact of shadows.
Once the screen is lit to your satisfaction, add the main lighting for the subjects just after your screen light are turned off. This new set of lights may create shadows on the screen. Adjust the light positions and filters until you get the best compromise.
More Greenscreen Studio Tips:
 a. If you are renting greenscreen studio services try to use the same studio. In most studios there will be some variation in the screen color. If you have your own greenscreen studio at home, use the same green screen.
b. Try to select a part of the screen which best represents the overall color.
c. Make sure anyone appearing in your video will wear green if you're using a green screen. Avoid using green props and other objects in your greenscreen studio.
d. Avoid logos and symbols on people's clothing, after adding the key they become horribly holes in the person's body.
e. Some colors and shades work better than others. For example, dark clothes will create a green rim around foreground objects than light colors.
Come and make some easy fun videos with Greenscreen Studio Frre Guide.


No comments:
Post a Comment